Publish ML Model as API or Web Page: Flask and Digital Ocean

After building and training your Machine Learning model, the next step is to publish it for others to make predictions. In this tutorial, we will show how to package the model and deploy it as an API or a web page.
Table of Contents
- The Model We're Working With
- Creating a Reusable Model
- Publishing the Model as API with Flask
- Building the Web App for the Model
- Prepare the Project for Deployment
- Deploying the API/Web App on Digital Ocean
The code repository is available, the link is at the bottom of this tutorial.
Let's go!
The Model We're Working With
For this tutorial, we take a Model that predicts a person's salary based on their years of experience and their skill level. We had built this model in the Intro to Machine Learning Course.
However, the actual model doesn't really matter that much. Our goal of this tutorial is to show you the process of publishing any model with input numbers and output results.
Our initial data looked like this:
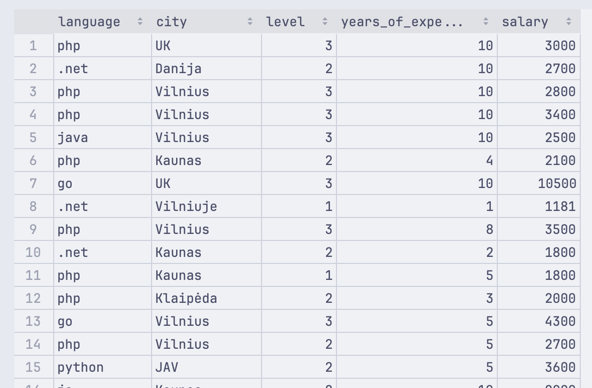
We have used this data to train our model like this:
model/model.py
import pandas as pdfrom sklearn.model_selection import train_test_splitfrom sklearn.linear_model import LinearRegressionimport os df = pd.read_csv('salaries-2023.csv') # Languages we want to use in our modelallowed_languages = ['php', 'js', '.net', 'java']df = df[df['language'].isin(allowed_languages)] # Fixing the city namesvilnius_names = ['Vilniuj', 'Vilniua', 'VILNIUJE', 'VILNIUS', 'vilnius', 'Vilniuje']condition = df['city'].isin(vilnius_names)df.loc[condition, 'city'] = 'Vilnius' kaunas_names = ['KAUNAS', 'kaunas', 'Kaune']condition = df['city'].isin(kaunas_names)df.loc[condition, 'city'] = 'Kaunas' # Cities we want to use in our modelallowed_cities = ['Vilnius', 'Kaunas']df = df[df['city'].isin(allowed_cities)] # Filtering out the salaries that are too highdf = df[df['salary'] <= 6000] one_hot = pd.get_dummies(df['language'], prefix='lang')df = df.join(one_hot)df = df.drop('language', axis=1) one_hot = pd.get_dummies(df['city'], prefix='city')df = df.join(one_hot)df = df.drop('city', axis=1) x = df.iloc[:, 0:2].valuesy = df.iloc[:, 2].values x_train, x_test, y_train, y_test = train_test_split(x, y, test_size=0.2, random_state=0) model = LinearRegression()model.fit(x_train, y_train)Then, we were able to predict the salary of a person like this:
# ... # 3 means senior level# 8 is years of experiencesalaries = model.predict([[3, 8]])print(salaries[0])This gave us a prediction of 3391.89 - the expected salary of a person with 8 years of experience and a senior level.
Of course, all of this was running locally on our computer. So, the next step was to publish it as an API.
Creating a Reusable Model
Before diving into API development, we have to save our Model into a file, to avoid it being trained on each run.
We will do that with Joblib library.
pip install joblibimport joblib # ... joblib.dump(model, 'model.pkl')This will create a model.pkl file in our folder. Now, we can load it into other functions or Python files, like this:
# ... model = joblib.load('model.pkl')Now, let's separate two things into functions:
- Creating the model
- Making predictions with that model
model/model.py
import pandas as pdfrom sklearn.model_selection import train_test_splitfrom sklearn.linear_model import LinearRegressionimport osimport joblib def create_model(current_dir): df = pd.read_csv(os.path.join(current_dir, 'salaries-2023.csv')) allowed_languages = ['php', 'js', '.net', 'java'] df = df[df['language'].isin(allowed_languages)] vilnius_names = ['Vilniuj', 'Vilniua', 'VILNIUJE', 'VILNIUS', 'vilnius', 'Vilniuje'] condition = df['city'].isin(vilnius_names) df.loc[condition, 'city'] = 'Vilnius' kaunas_names = ['KAUNAS', 'kaunas', 'Kaune'] condition = df['city'].isin(kaunas_names) df.loc[condition, 'city'] = 'Kaunas' allowed_cities = ['Vilnius', 'Kaunas'] df = df[df['city'].isin(allowed_cities)] df = df[df['salary'] <= 6000] one_hot = pd.get_dummies(df['language'], prefix='lang') df = df.join(one_hot) df = df.drop('language', axis=1) one_hot = pd.get_dummies(df['city'], prefix='city') df = df.join(one_hot) df = df.drop('city', axis=1) x = df.iloc[:, 0:2].values y = df.iloc[:, 2].values x_train, x_test, y_train, y_test = train_test_split(x, y, test_size=0.2, random_state=0) model = LinearRegression() model.fit(x_train, y_train) joblib.dump(model, os.path.join(current_dir, 'model.pkl')) def predict_salary(experience, level): current_dir = os.path.dirname(__file__) # Check if the model exists. If not - create it if not os.path.isfile(os.path.join(current_dir, 'model.pkl')): create_model(current_dir) # Load the saved model model = joblib.load(os.path.join(current_dir, 'model.pkl')) # Use the loaded model to make predictions salaries = model.predict([[int(level), int(experience)]]) return salaries[0]Doing this allows us to have a reusable Model and call it like this, from external Python files:
some_other_file.py
from model.model import predict_salary salary = predict_salary(experience=8, level=3)print(salary)The first call will create a Model file if it does not exist and take a little bit longer, while any subsequent calls will be much faster as the Model will be loaded from the file.
Publishing the Model as API
To create our API system, we will use Flask library. Flask is a Python library that allows us to create a web server and define endpoints that can be called from the outside. Let's install it:
pip install flaskpip install waitressNote: Waitress is a library that allows us to run our Flask app in production. It is not required for development, but it is a good idea to use it in production.
Now we can create our Flask app:
app.py
from flask import Flaskfrom waitress import serve app = Flask(__name__) @app.route('/')def homepage(): return "Welcome to the Salary Prediction homepage" if __name__ == '__main__': serve(app, host="0.0.0.0", port=8080)Now, we can run our App like this:
flask runAnd we should see the following pop-up:

Now, we can open the URL in our browser and see the following:
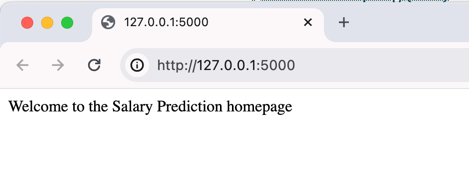
Of course, this is not API yet, but we already have a web server running with 8 lines of code.
Next, let's work on an actual API endpoint. Here's how we can do that:
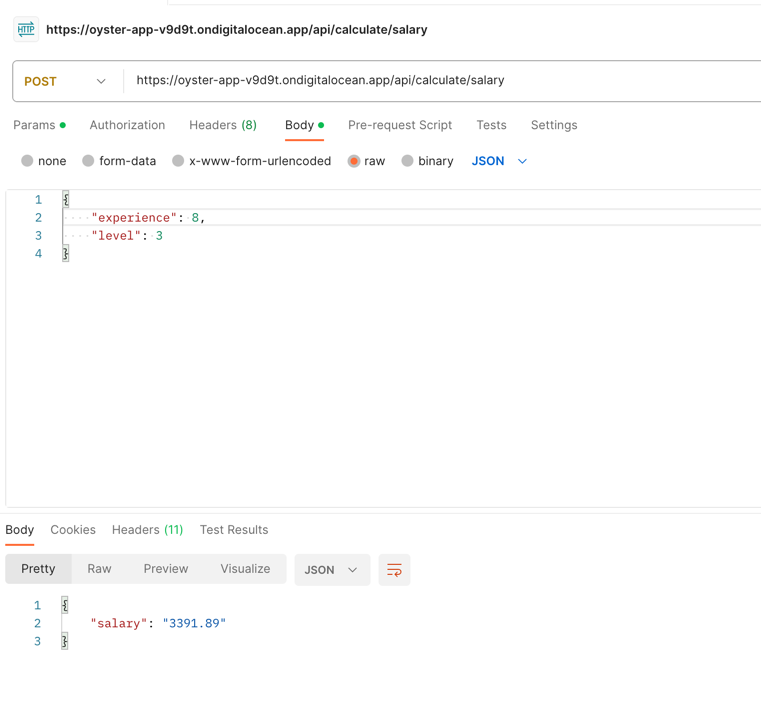
from flask import Flask from flask import Flask, request, jsonifyfrom model.model import predict_salaryfrom waitress import serve app = Flask(__name__) @app.route('/')def homepage(): return "Welcome to the Salary Prediction homepage" @app.route('/api/calculate/salary', methods=['POST'])def salary_calculation_api(): return jsonify({ "salary": "{:.2f}".format(predict_salary(request.json['experience'], request.json['level'])) }) if __name__ == '__main__': serve(app, host="0.0.0.0", port=8080)Now we can run our application using flask run and call our API endpoint like this in Postman:
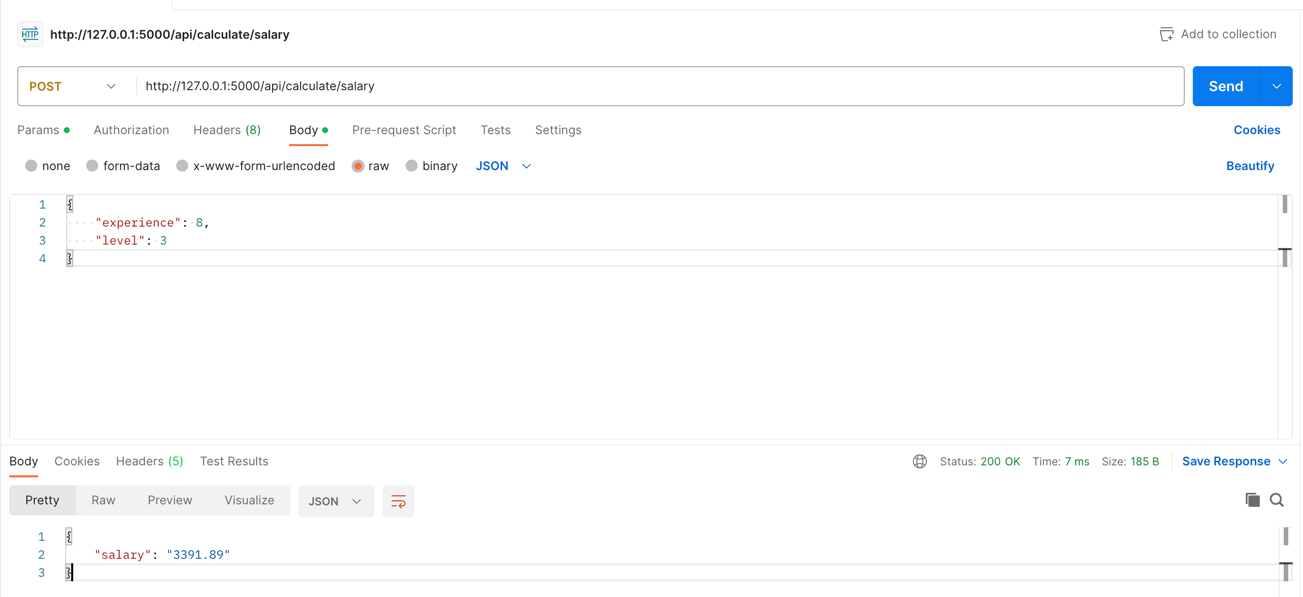
That's it! Our API endpoint is ready!
Next, we will look at a web page built with Flask.
Building the Web App for the Model
Not every application that uses a Model will interact with our client via API.
Sometimes, we must build a simple form where the user can enter the data and get the result. Let's do that with Flask, in the same app.py file:
app.py
from flask import Flask, jsonify from flask import Flask, render_template, request, jsonify @app.route('/api/calculate/salary', methods=['POST'])def salary_calculation_api(): return jsonify({ "salary": "{:.2f}".format(predict_salary(request.json['experience'], request.json['level'])) }) @app.route('/calculate/salary', methods=['GET'])def salary_calculation_get(): # Jinja2 template engine is used to render HTML page return render_template('form.html') @app.route('/calculate/salary', methods=['POST'])def salary_calculation(): salary = "{:.2f}".format(predict_salary(request.form['experience'], request.form['level'])) return render_template('form.html', salary=salary, experience=request.form['experience'], level=request.form['level']) if __name__ == '__main__': serve(app, host="0.0.0.0", port=8080)Here, we did a few things:
- We have added two routes - the GET route that will return a template (we'll create it in a second) and the POST route that will accept the form data and return the template with the result
- In our POST route, we use
request.formto get the form data and return it back to the template with parameters
Now, we need to create a template that will be used to render our form:
templates/form.html
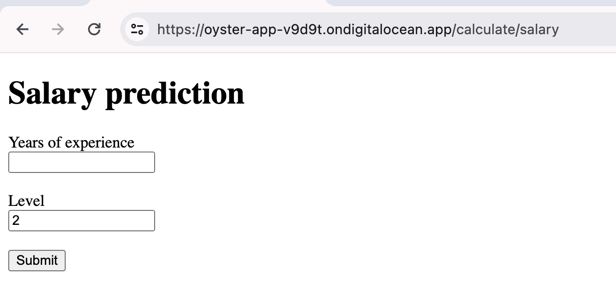
<!DOCTYPE html><html lang="en"><head> <title>My Webpage</title></head><body> {% if salary %} <h1>Predicted Salary</h1><p>{{ salary }}</p> {% endif %} <h1>Salary prediction</h1> <form method="POST" action="/calculate/salary"> <label for="experience">Years of experience</label><br/> <input type="text" id="experience" name="experience" min="1" max="10" step="1" value="{{ experience }}"> <br/><br/> <label for="level">Level</label><br/> <input type="text" id="level" name="level" value="2" min="1" max="3" value="{{ level }}"> <br/><br/> <input type="submit" value="Submit"></form> </body></html>Once you create this template - we can launch our application with flask run and open the following URL in our browser:
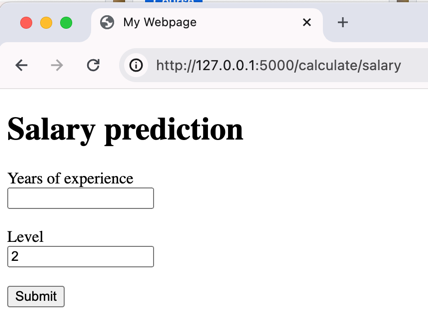
Now we can enter the data and get the result:
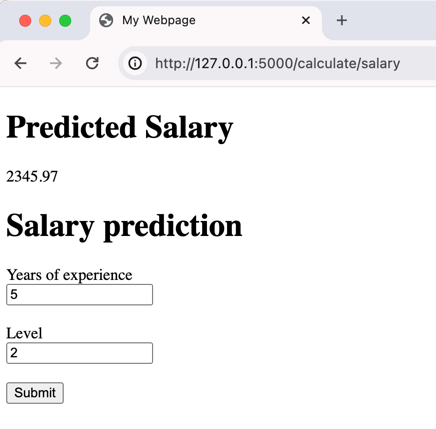
That's it! We have created a simple web app that uses our model to predict a person's salary.
The next step is to deploy it to a remote server, for everyone to use!
Prepare Project for Deployment
Before the deployment to production, we need to configure three files in our project:
- requirements.txt: each project requires different packages, so we have to tell the server what packages we need
- runtime.txt: what version of Python we are using
- Procfile: this file will tell the server how to run our application
Let's create the requirements file first:
requirements.txt
flaskpandasscikit-learnjoblibwaitressNote: This file can also be created using the pip freeze > requirements.txt command, which will include all the packages installed on your computer. Creating a new virtual environment and installing only the required packages for your project is a good idea.
Next, we need to create a runtime.txt file that will tell the server what version of Python we are using:
runtime.txt
python-3.12.1Note: This file is optional. If you do not specify the version of Python, the server will use the latest version.
Finally, we need to create a Procfile that will tell the server how to run our application:
Procfile
web: python app.pyNote: This file is required. The server will only know how to run your application if you specify it.
That's it! We have the basics covered and are ready to deploy our application to production.
Deploying the Model and Web App on Digital Ocean
Now that we have a fully working Web App and API, both using our Model, we should deploy it to some server so other people can use it.
For this tutorial, we will use Digital Ocean.
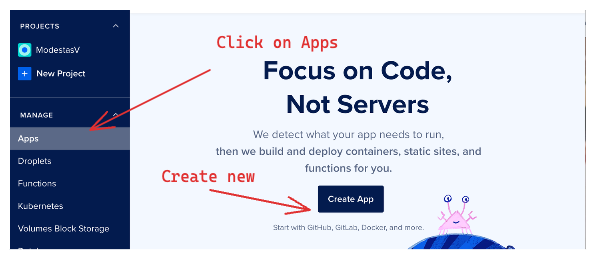
To get started, we need to create a new App in Digital Ocean:
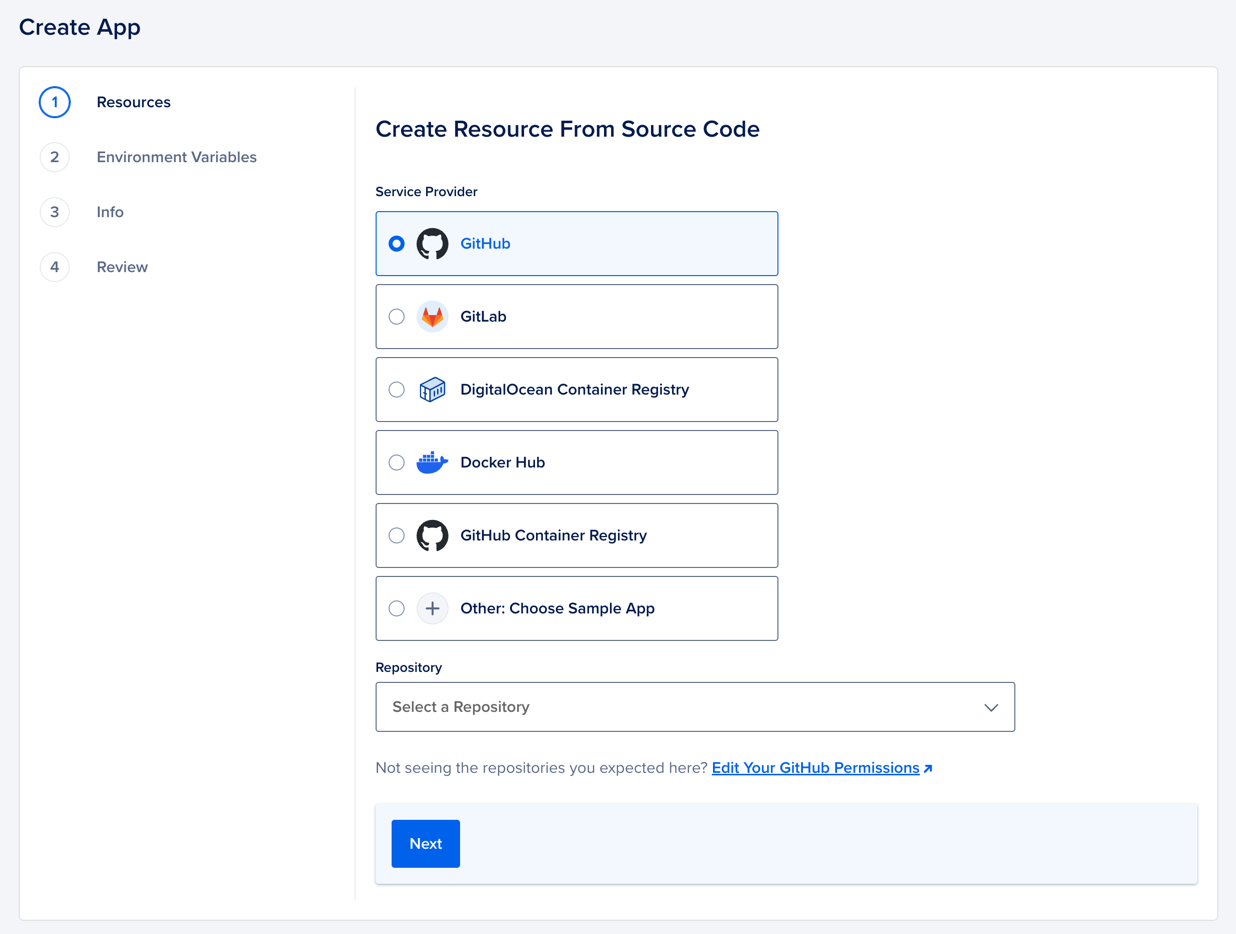
Then we need to select the Source - we will use GitHub:
Then, we need to select the repository and branch:
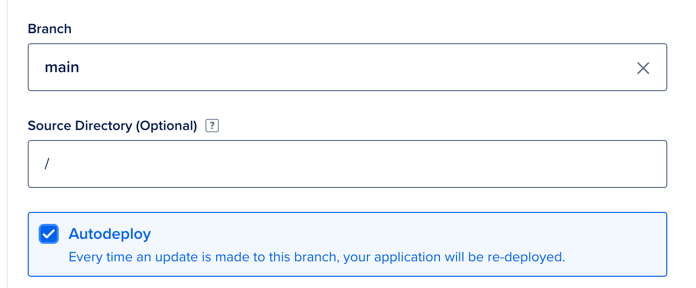
Since we have /app.py in our root folder, we can leave these fields as Default. You might need a different configuration if you have a different folder structure.
Then we click Next and configure the Server tier:
You can leave it as Default (it will cost $24 per month) or edit the plan and choose a cheaper option. For this tutorial, we will use the default option.
Then we click Next and we should see Environment Variables:
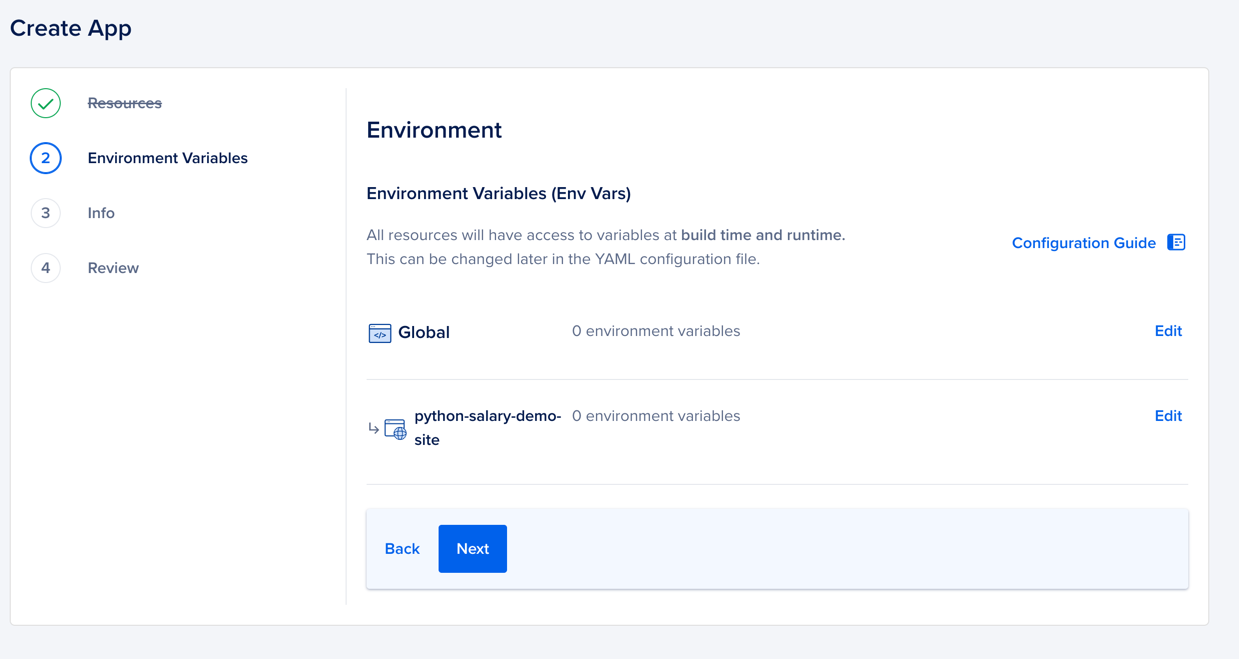
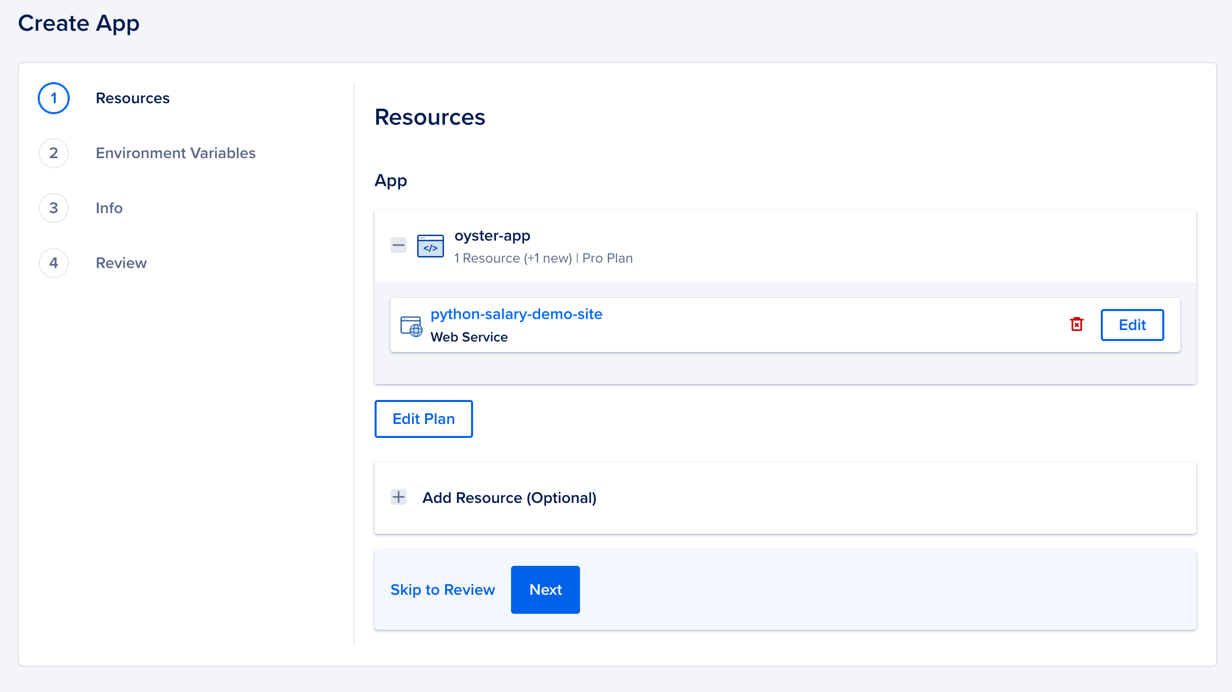
Since we don't have any, press Next. This should give you an overview of your App:
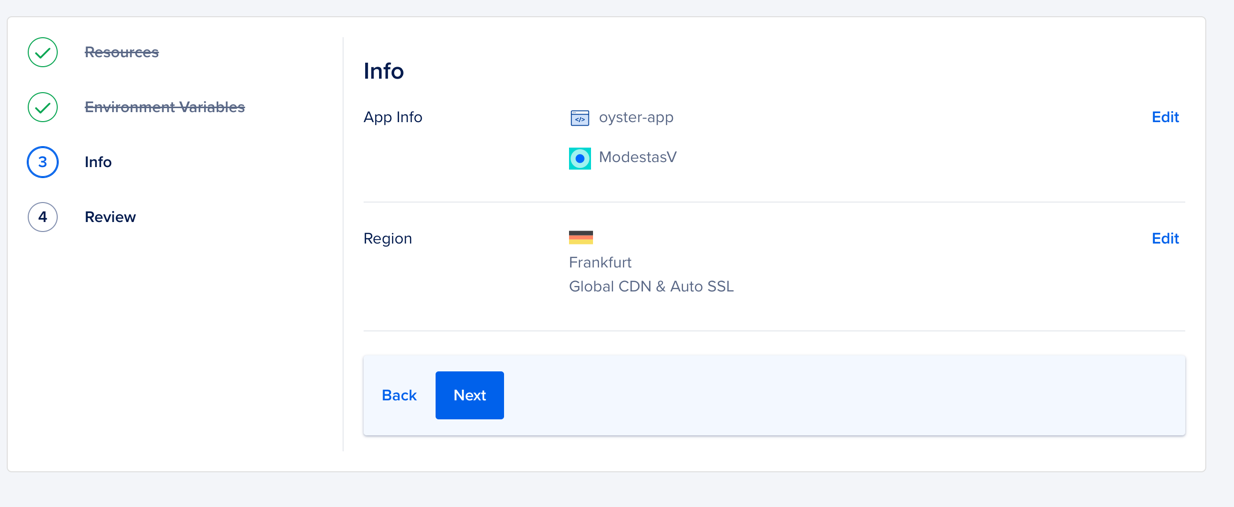
Clicking Next will give you a complete overview of your soon-to-be-created App:

If everything looks good - click Create Resources and wait for the app to be created:
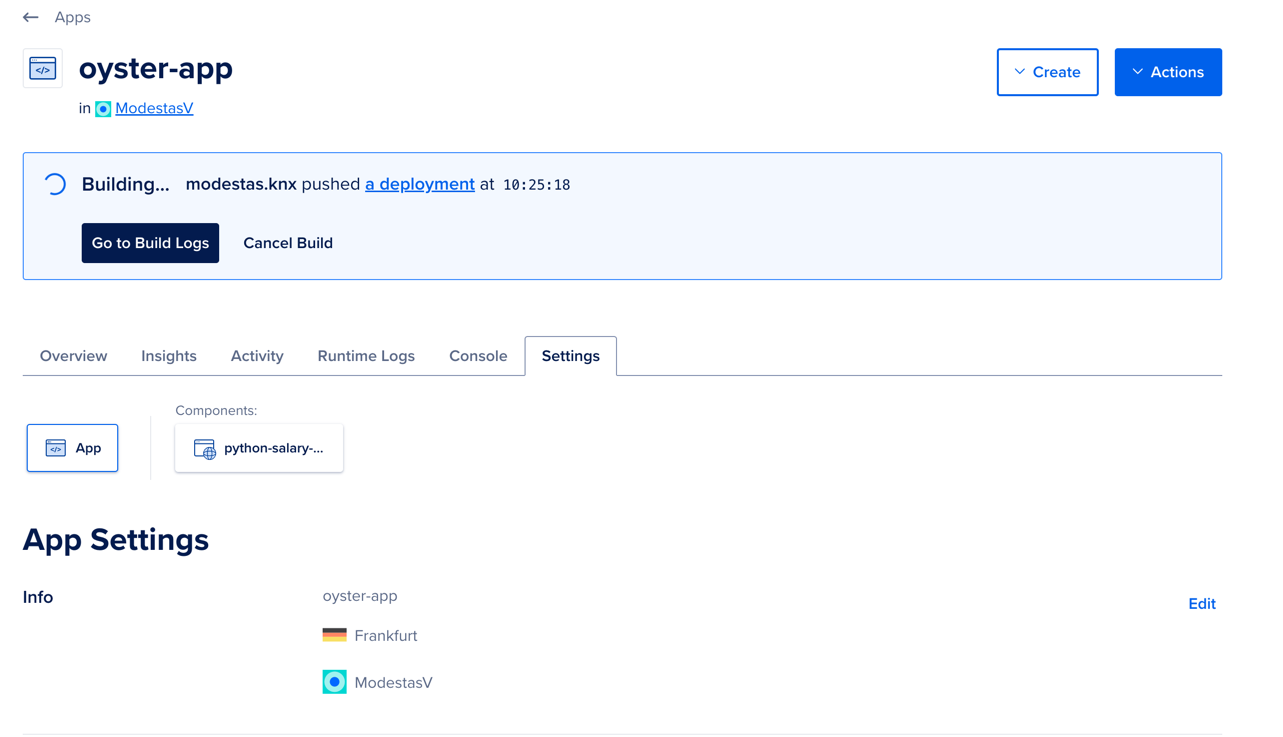
Here, we can go into Build Logs and see the progress:
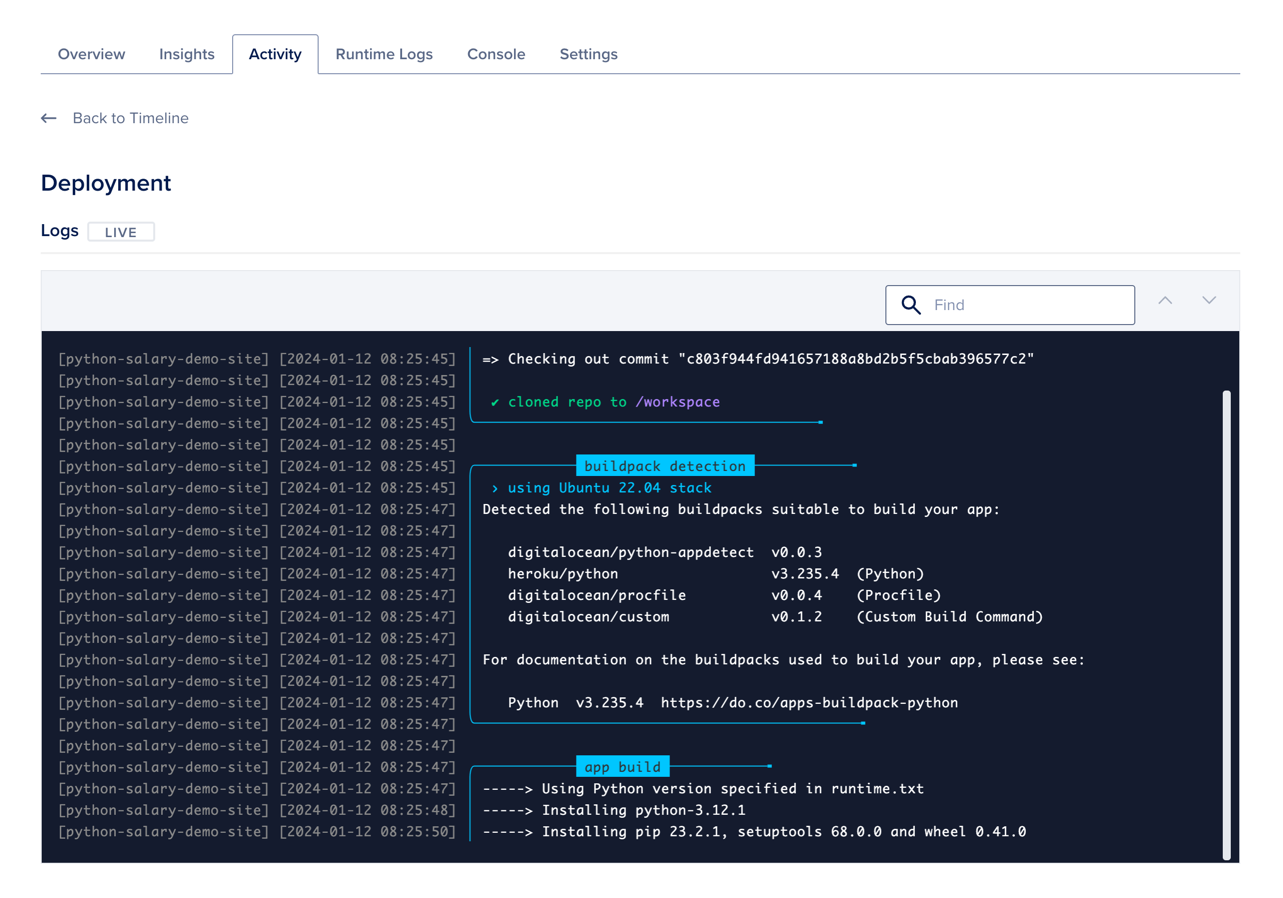
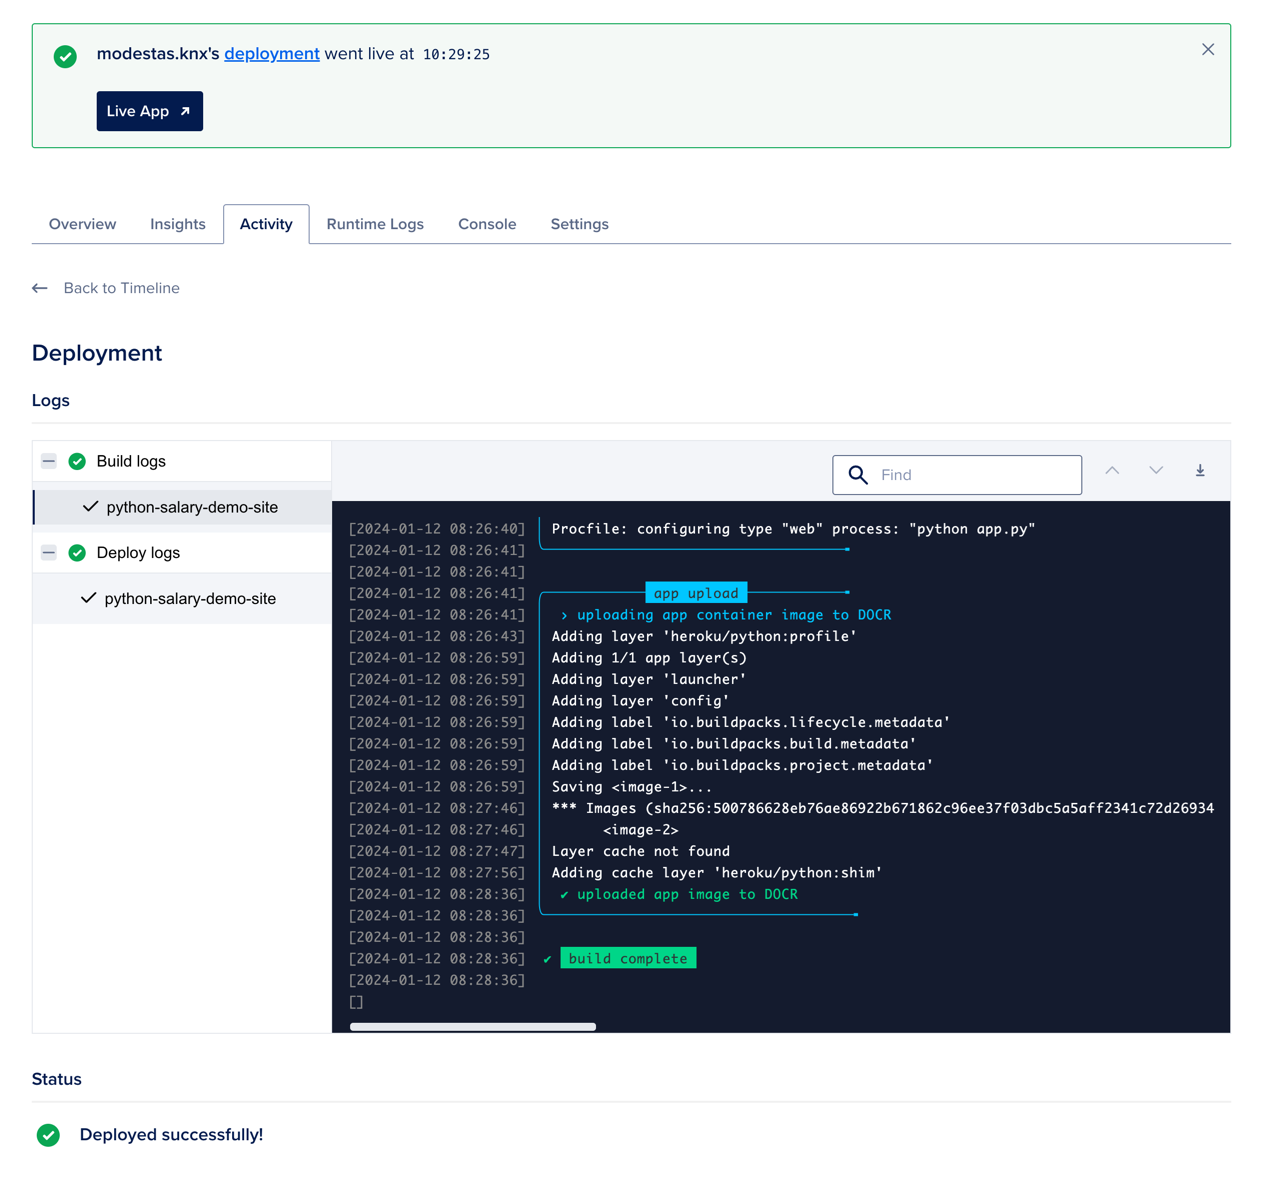
We need to wait until the app is created and deployed. This can take a few minutes, so be patient. Once it is done - you should see the following:
Now, once this is Deployed, we can go into Settings and see the URL of our app:
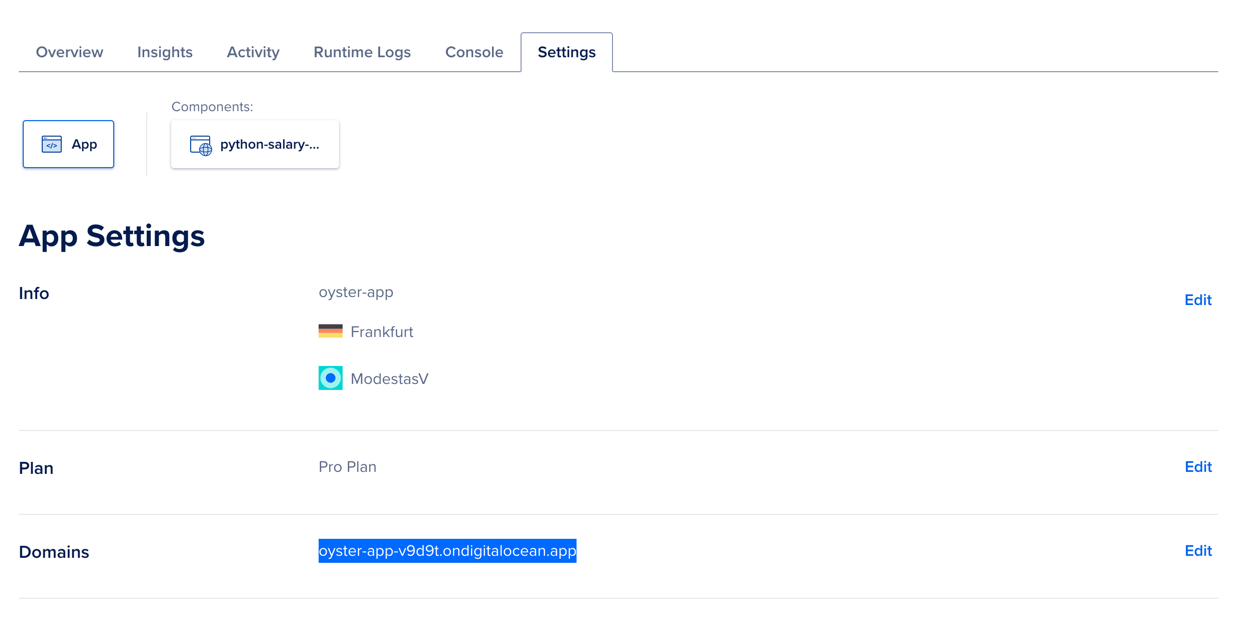
Note: This URL in the image will not actually work, we created it just for demo purposes of this tutorial.
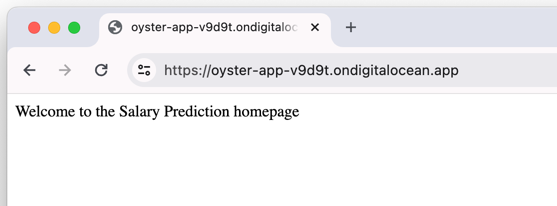
Now, we can open this URL in our browser and see the following:
Or we can open the /calculate/salary endpoint and see the following:
And, of course, we can call the /api/calculate/salary endpoint in Postman:
That's it! Your Model is now live as a Web Page or an API! From there, you can expand the functionality and add more features.
You can find all the source code in this GitHub repository.
Hi, here
there are double
value="..."items. Is this a typo?Hi, good catch! I missed this while writing, but somehow it did not cause any issues in testing too... :)
Missed the 'e' in 'the' :)
Thanks, fixed.